
Subinterfaces: The Artist formerly know as Router-On-A-Stick
September 10, 2021I wrote an article not too long ago about VLAN tagging from a post Cisco perspective. Since I covered the layer 2 aspect, I figured why not complete the setup and show how to configure Virtual Interfaces. I have a SonicWall handy, so I am going to demonstrate with that device.
Besides routers/firewalls behaving vastly different than switches, routers are interface restrictive. Coming across a 20-50 port switch is pretty common. In fact it’s necessary for a wired network–all those links coming back from the patch panel. Working on a 50 port router isn’t all that common. Routers are more expensive than switches too, so the typical setup of a router with a handful of ports connecting to a downstream switch is much more cost effective.
However, a physical router port/interface can only have one subnet assigned to it; and the downstream switch can only be a part of that one subnet–broadcast domain. This hold true until you know how to configure Virtual Interfaces. Once you know how to do that, you can segment your network many different ways on the same interface. Let’s set one up.
I’ve got a four port SonicWall here with some pre-configured Virtual Interfaces.
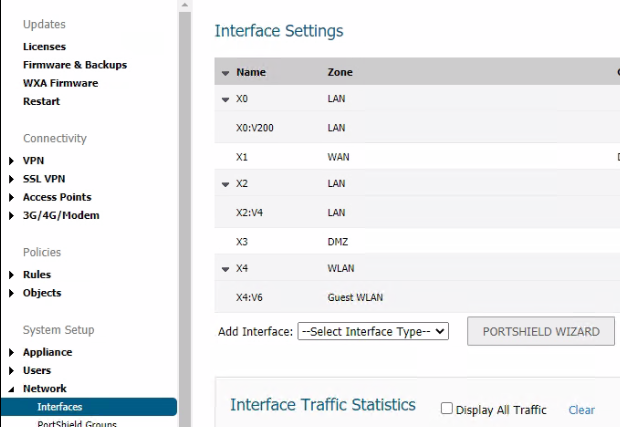
Don’t worry about Zone assignments for now–we’re going to use LAN anyway. This SonicWall is a firewall, so Zones are an additional security feature that aren’t available on a typical router.
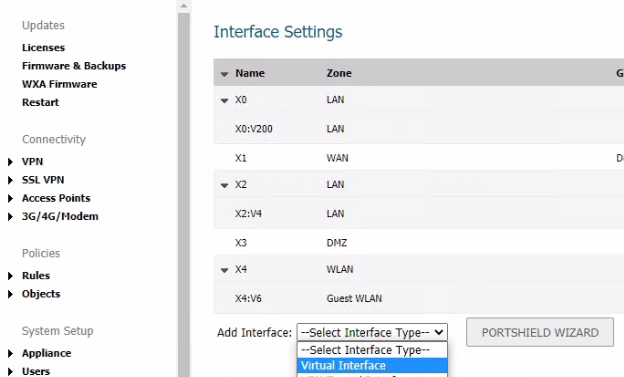
Let’s add a new Virtual Interface. Select the “Add Interface” drop down box and “Virtual Interface.”
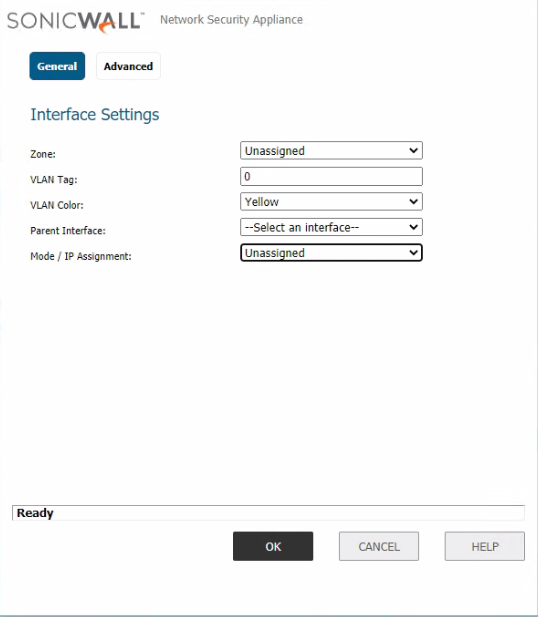
Right off the back, you’ll see a few options.
Zone: The zone I mentioned not to worry about previously.
VLAN Tag: VLAN Identifier (Pick one not in use)
VLAN Color: This is just a graphical feature. It doesn’t have anything to do with the routing or switching of this network.
Parent Interface: This is a Virtual Interface. Virtual still has to exist on something physical. So assign it to the port/interface that you want
Mode / IP Assignment: We’re not messing with this one yet. But it will be static assignment.
Let’s configure this. Once you change the Zone, the rest of the appropriate options will appear:
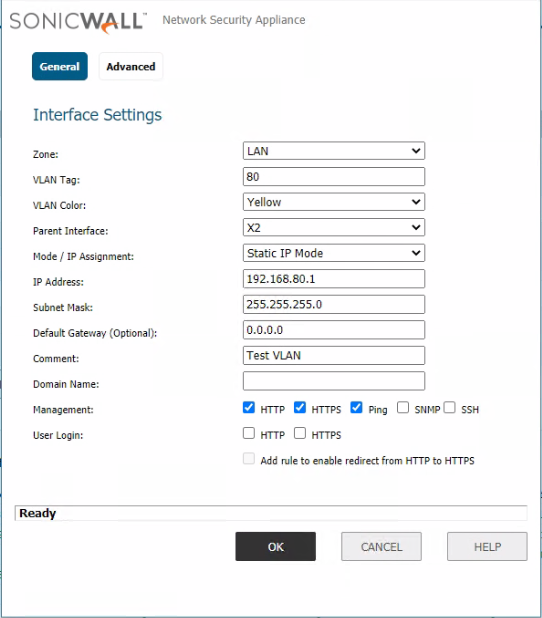
Zone: LAN because we are doing internal routing with this.
VLAN Tag: 80 Because its available and it was the first thing I thought of.
VLAN Color: Yellow is default. You can change these around if you want a better graphical display in your admin view.
Parent Interface: X2.
Mode/ IP Assignment: Static
IP Address: Could be anything you want. Best practice is to keep the subnet and VLAN ID the same. This is also the gateway for your downstream devices, so keep the addressing in mind as well. An address of .1 in its subnet is pretty common.
Subnet Mask: Class C
Default Gateway: This will automatically produce 0.0.0.0 (gateway of last resort).
Comment: You can put anything you like
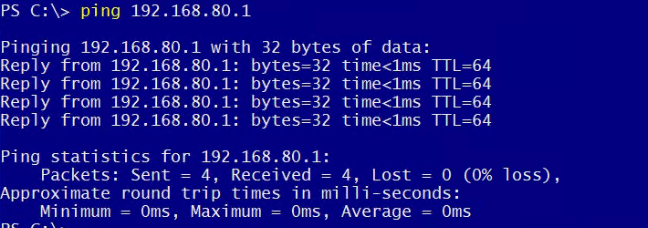
I also checked off HTTP, HTTPS and ping for management. I would at least allow ping on the interface to do your preliminary network checks.
Hit okay, and it should appear in the interface list.
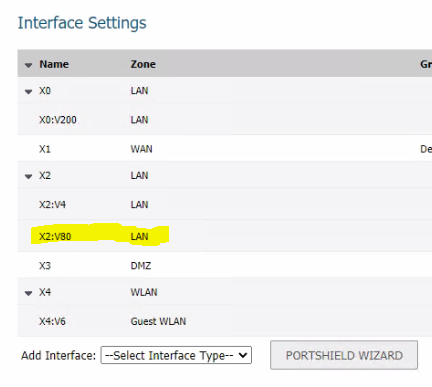
There we go. Not too bad. One important thing to check is that the route table is updated with the new interface. Since it’s considered a static route, it should update automatically and be ping-able from a different subnet. It’s always best to double check, though.

And the SonicWall added it in automatically.

A thing of beauty.
So, in this particular case, we have two Virtual Interfaces on our X2 interface. Whatever switch we plug into that interface (assuming its a switch and not a router), we would want to set that switch uplink to Trunk to carry both VLANs across the link. We would also want to create VLAN 4 and 80 on the switch and assign the ports accordingly.
Thanks for reading and happy Networking.