
Secure Mail in Office 365
May 17, 2021If you are looking for a simple secure mail solution, and are already in Office 365, chances are good you have one ready to deploy.
Office Message Encryption (OME) works with Azure Rights Management Services (RMS) to provide this service to 365 customers. The quickest way to see if your cloud tenant is already secure mail capable is to use PowerShell.
- Connect to Exchange Online via PowerShell. Here’s the commands if you don’t have them handy:
- Set-ExecutionPolicy RemoteSigned
- $UserCredential = Get-Credential
- $Session = New-PSSession -ConfigurationName Microsoft.Exchange -ConnectionUri https://outlook.office365.com/powershell-liveid/ -Credential $UserCredential -Authentication Basic -AllowRedirection
- Import-PSSession $Session -DisableNameChecking
- Bear in mind, basic authentication will eventually be deprecated and Exchange Online PowerShell V2 will be the standard. Also, basic authentication does not work with MFA enabled accounts.
- Get-IRMConfiguration
- You want to see that AzureRMSLicensingEnabled is set to True
- If AzureRMS is set to False, use the Set-IRMConfiguration cmdlet to change the Boolean value to True


If all looks well so far, the last thing to check will be IRM Configuration from a user’s mailbox.
3. Test-IRMConfiguration -Sender usermailbox@myorganization.com
We’re looking for happy output with this command. Such as:

The last thing to do will be to check the functionality in Outlook. If this is the first time in the Outlook client sending a secure mail (chances are decent it is) you’ll have to download the templates from the server. Very easy task from the user end.
Open the Outlook client and start a new message. Within that message go to the Options tab. There (depending on which Channel of Office you are on) you’ll see Options or Encrypt. Newer channel will say Encrypt, older will say Options. The proceeding steps are the same. Click the Encrypt/Options button or the down arrow. Clicking the button just skips a step. If you select the down arrow, click “Connect To Rights Management Servers and get templates.” Both of these will download the pre-configured templates on the server, or any custom ones you make–Out of the box should templates should work for almost any organization.


From there when you click on the down arrow you should see the new options.
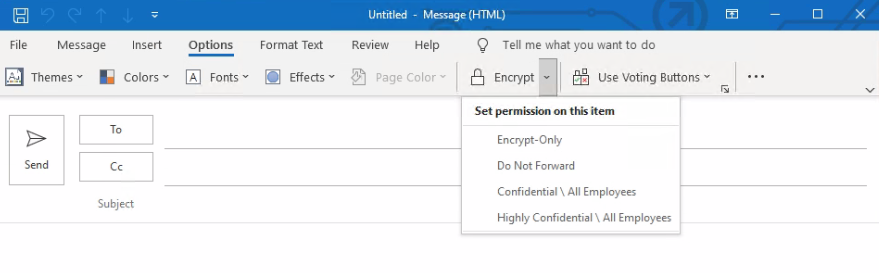
You can now send encrypted emails from that Outlook client. A few notes to wrap this article up:
- The options for Encrypt-Only and Do Not Forward work differently. Encrypt-Only sends a secure message, but does not prevent any further printing, copying and forwarding from the recipient. Do Not Forward prevents copying, forwarding and printing of the e-mail you (or the employee) sent.
- If you click the Encrypt button, it will use Encrypt-Only by default
- Outlook (office.com) on the web works very closely, but the location of the button is not identical to the Outlook client

- If you want to change the look of your secure mail/OME tenant, check out the Get-OMEConfiguration command in powershell. There’s ways to leverage Social Id Sign in, custom logos and changing the background color.
Thanks for reading and feel free to message me any ideas for further Articles or Videos.